Are you tired of battling with Uninstall Eclipse application? Whether it’s the sluggish performance, overwhelming complexity, or simply a preference for a sleeker development environment, sometimes it’s best to part ways with an old friend. But fear not! Uninstalling this powerful IDE doesn’t have to be a headache-inducing ordeal. In this guide, we’ll walk you through each step of the process—ensuring that Eclipse is gone for good while keeping your system clean and clutter-free. Get ready to reclaim valuable disk space and enjoy smoother coding experiences as we dive into the art of uninstalling Eclipse once and for all!
Introduction to Eclipse and its popularity among developers
Eclipse has long been a go-to integrated development environment (IDE) for developers around the globe. Its rich features and versatility have made it a favorite among those working on Java applications, web projects, and more. However, as technology evolves, so do the needs of programmers. Whether you’re seeking lighter alternatives or simply looking to streamline your workflow, there may come a time when you decide it’s best to part ways with Eclipse on Mac.
If you’re contemplating this transition but are unsure how to proceed with uninstalling Eclipse from your Mac safely and effectively, you’ve landed in the right place. This guide will walk you through every step of the uninstallation process while addressing any common issues that might arise along the way. Say goodbye to Eclipse stress-free!
Reasons for uninstalling Eclipse from your Mac
Eclipse has long been a favorite among developers, but it’s not without its drawbacks. Many users find that the IDE can be overly resource-intensive. This can slow down their
, especially when multitasking or working on larger projects.
Another common complaint is its steep learning curve. While Eclipse offers a plethora of features, navigating them can overwhelm new users. For those seeking simplicity and efficiency, this complexity might lead to frustration.
Compatibility issues also arise from time to time. Developers often need the latest tools for specific tasks; if Eclipse doesn’t keep pace with updates, it could limit productivity.
Lastly, some prefer alternative environments that cater more directly to their workflow needs. Personal preference plays a significant role in choosing an IDE—what works for one may not suit another at all.
Step-by-step guide on how to uninstall Eclipse from your Mac
To Eclipse on Mac, start by checking for any running processes. Open the Activity Monitor, search for “Eclipse,” and terminate any active instances. This ensures a clean uninstallation.
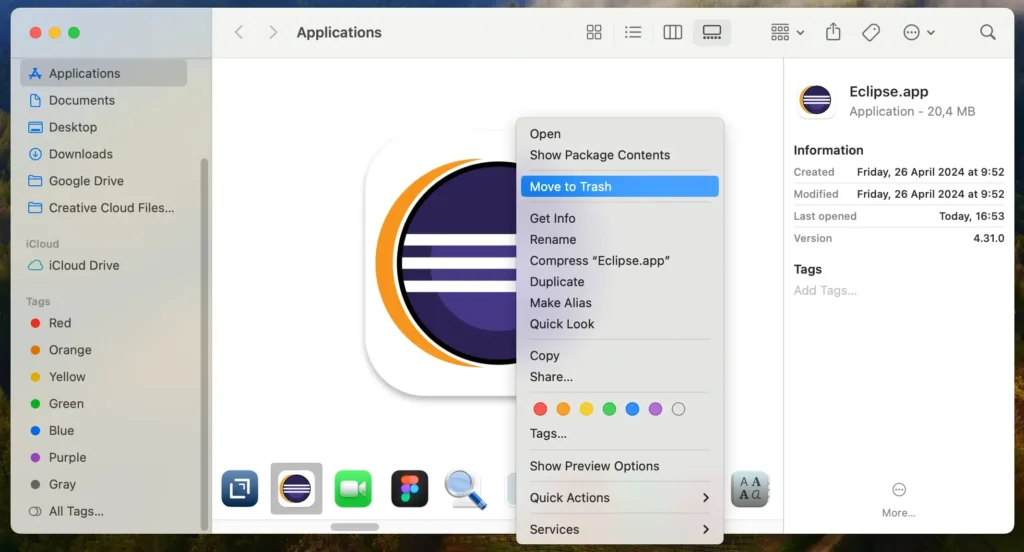
Next, locate the Eclipse application in your Applications folder. Simply drag it to the Trash or right-click and select “Move to Trash.”
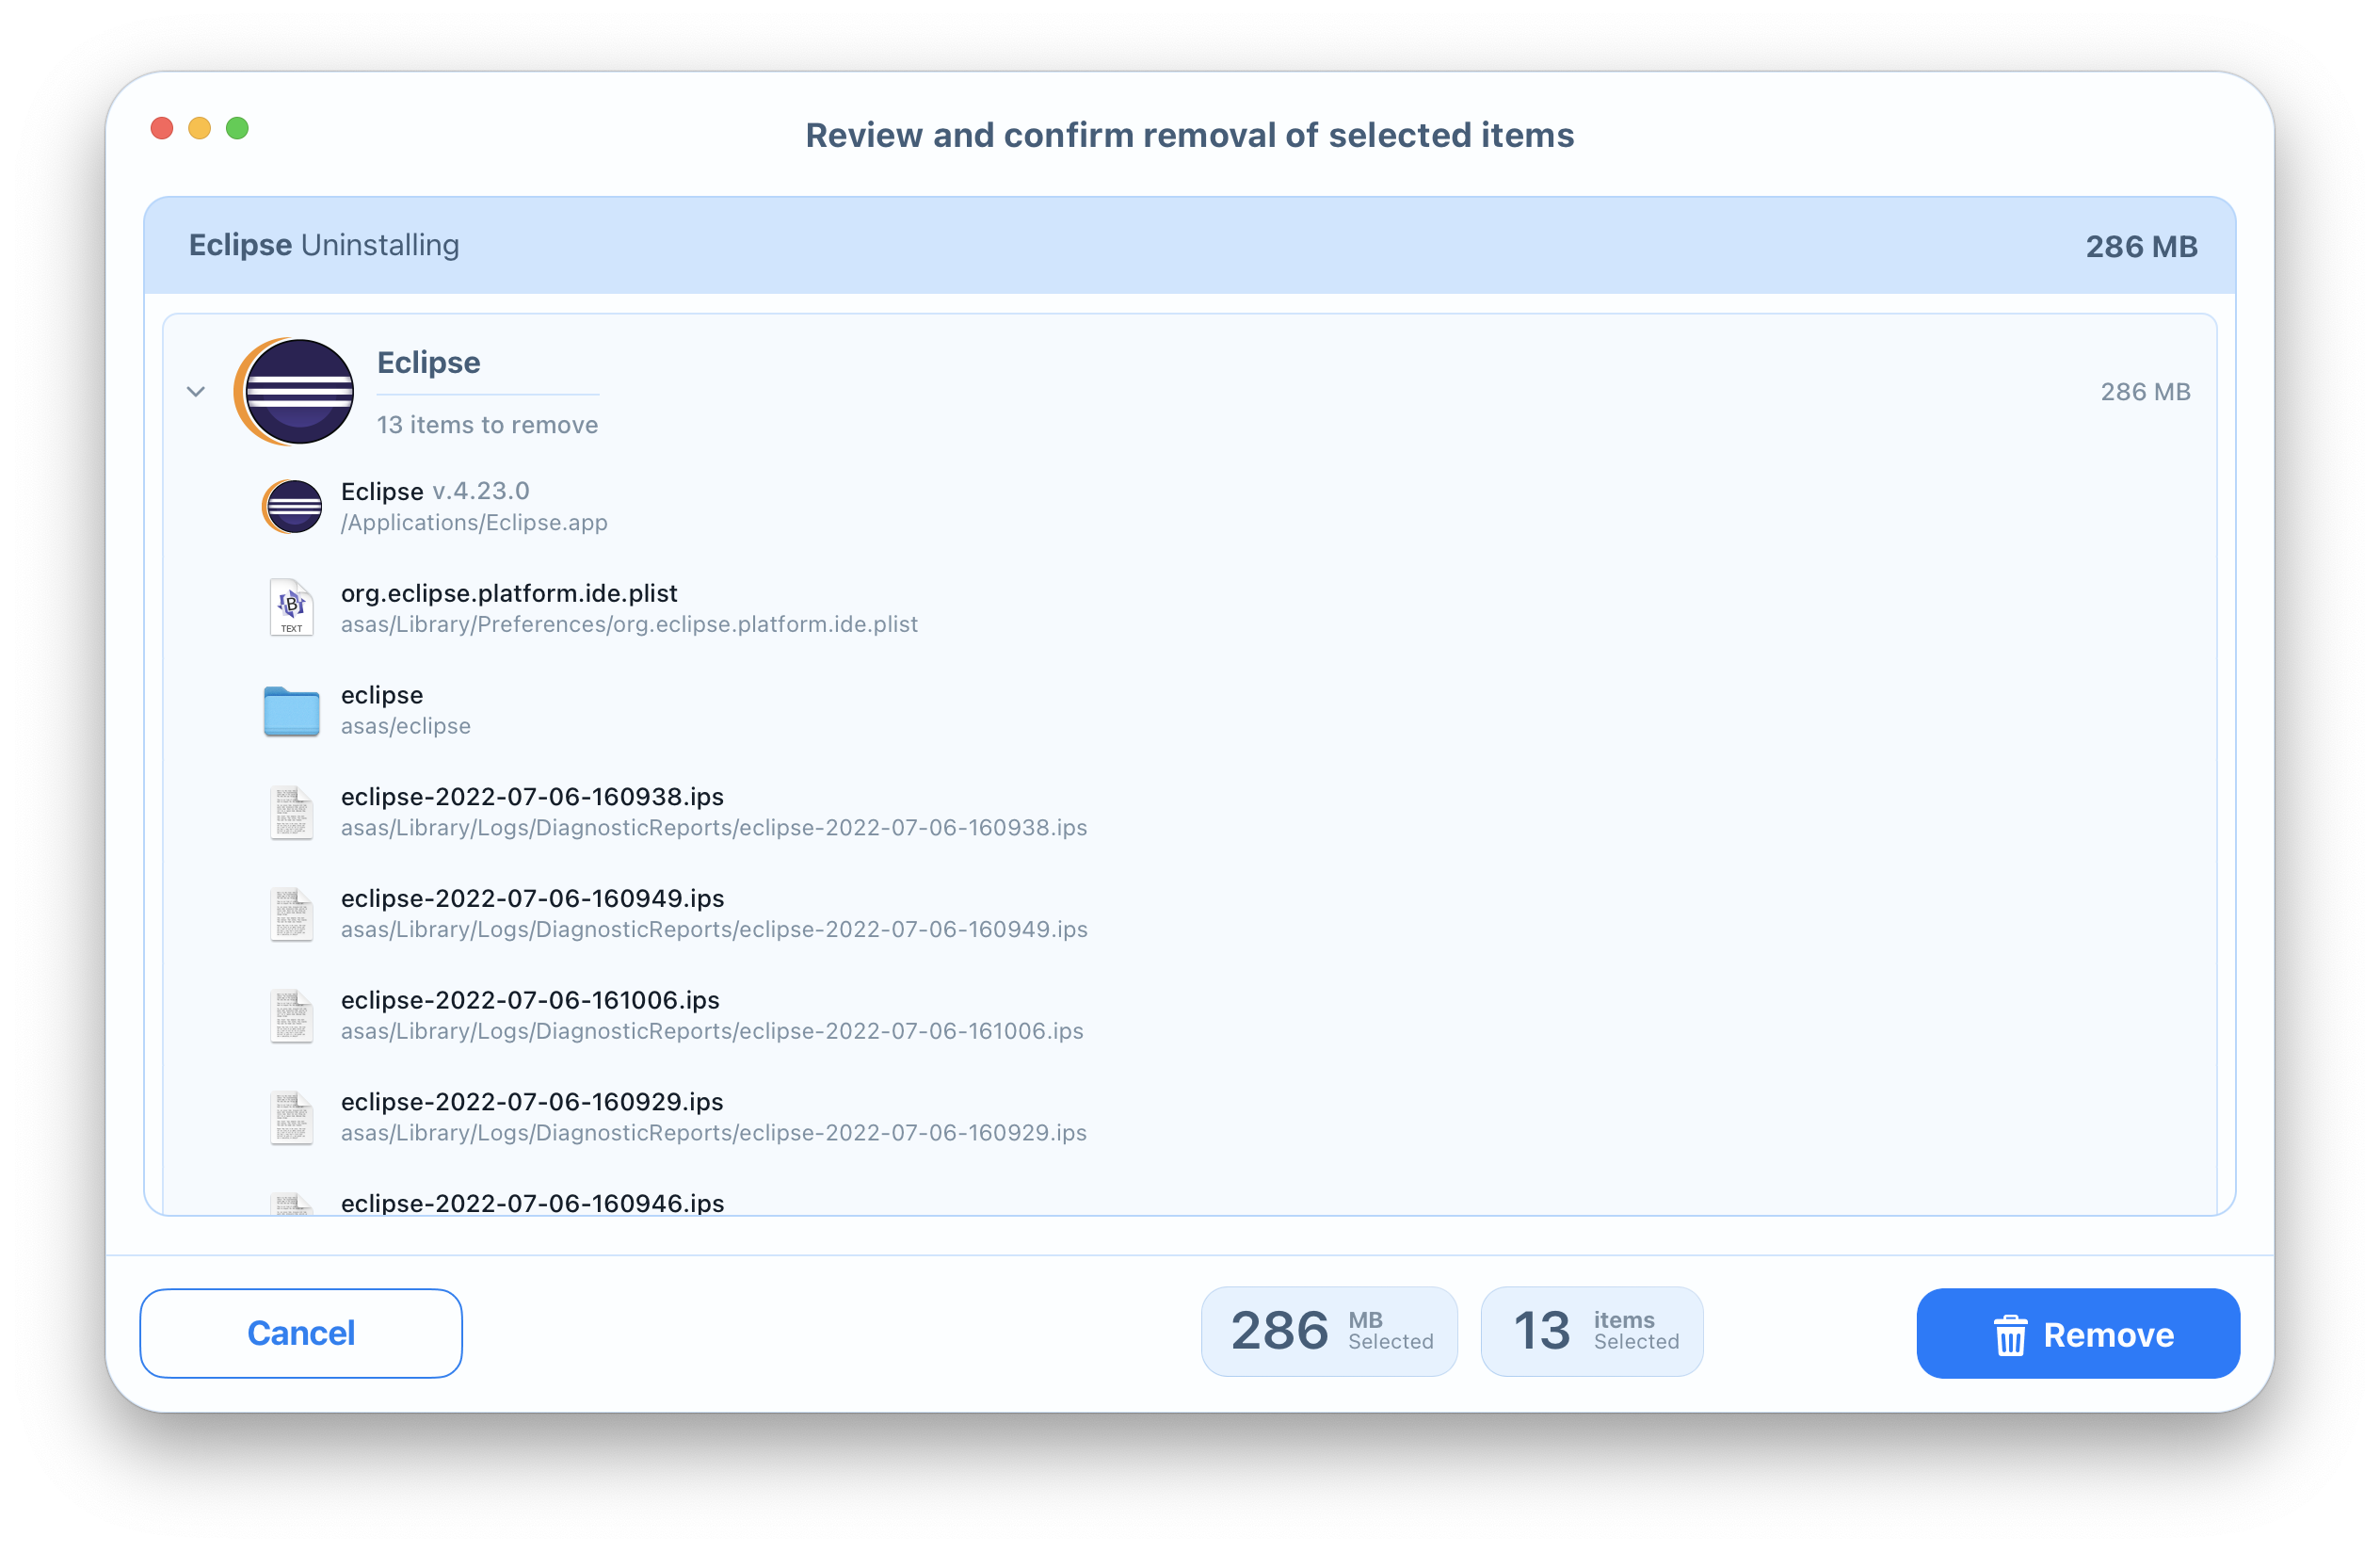
But that’s not all—the IDE often leaves behind related files. Navigate to ~/Library/Application Support/ and ~/Library/Caches/, searching for folders named ‘Eclipse’ or containing its plugins. Delete these remnants.
For a thorough cleanup, check out other directories like Preferences in ~/Library/. Look for settings related to Eclipse and remove them as well.
After tackling those files, consider emptying your Trash to finalize the process. You’re now free from Eclipse clutter on your Mac!
– Checking for any running processes and terminating them
Before uninstalling Eclipse on Mac, it’s crucial to ensure that no related processes are running. This step helps avoid complications during the uninstallation.
Open your Activity Monitor by searching for it in Spotlight or locating it in the Applications folder under Utilities. Once opened, you’ll see a list of all active applications and processes.
Look for any instances of Eclipse or Java-related processes. If you spot them, select each one and click the “X” button at the top left corner to terminate them.
This action will free up resources and prevent errors when removing files later on. Taking this precaution sets a solid foundation for a smooth uninstallation experience without lingering issues that could arise from background operations.
– Deleting the Eclipse application and its related files
To delete the Eclipse application from your Mac, start by locating it in the Applications folder. Simply drag the Eclipse icon to the Trash. This action removes the core application from your system.
However, just deleting the app isn’t enough. It’s crucial to eliminate any related files that could linger on your device. These may include configuration files, caches, and other supporting documents scattered across different directories.
Open Finder and navigate to “~/Library.” Here you’ll find several subfolders like Application Support and Preferences. Look for anything named “Eclipse” or similar and move those items to trash as well.
Don’t forget about plugins! Check within “~/Library/Application Support/” for folders containing plugins tied to Eclipse. Deleting these ensures a cleaner uninstall process without leftover remnants taking up space on your Mac.
– Removing Eclipse plugins and dependencies
When uninstalling Eclipse from your Mac, it’s essential to address the plugins and dependencies that may linger after removing the main application. These additional components can consume valuable space and potentially cause conflicts with other software.
To start, navigate to the Eclipse installation directory. You’ll usually find it in your Applications folder or wherever you initially installed it. Look for a “plugins” folder; this is where most extensions reside.
Manually delete each plugin by moving them to Trash. If you’ve installed any third-party libraries or frameworks alongside Eclipse, make sure to remove those too.
Don’t forget about dependency files that might be hidden within system folders like Library/Application Support or Library/Caches. A thorough cleanup ensures no remnants are left behind, paving the way for a fresh start with another IDE if you choose one later on.
– Clearing any leftover system settings
After removing the Eclipse application and its plugins, it’s essential to tackle any leftover system settings that may linger on your Mac. These remnants can create conflicts or consume unnecessary space.
Start by navigating to your user library. Open Finder, hold down the Option key, and select “Library” from the Go menu. This folder contains various files related to applications you’ve used.
Within the Library folder, look for subfolders like Application Support, Caches, Preferences, and Saved Application State. Search for anything labeled with “Eclipse” or similar terms. Delete those files carefully.
Don’t forget about configuration files often found in hidden folders too. To access these folders easily, use Terminal commands if you’re comfortable with them.
Taking these steps ensures that Eclipse no longer has a footprint on your system while enhancing overall performance. A clean slate will make room for whatever new IDE you choose next!

Troubleshooting common issues during the uninstallation process
Uninstalling Eclipse on Mac can sometimes lead to hiccups. One common issue users face is encountering error messages during the process. These can stem from leftover files or running processes that need to be terminated first.
If you see an error notification, check Activity Monitor for any active Eclipse-related processes. Terminate them before trying again. This simple step often resolves many uninstallation woes.
Another frequent problem is incomplete removal of plugins and dependencies that were added over time. Make sure to navigate through your Library folders—specifically, Application Support and Caches—to delete any remnants linked to Eclipse.
If you’re still struggling, don’t hesitate to restart your Mac after initial attempts at uninstallation. A fresh start can clear up system conflicts that may interfere with removing the IDE completely. With patience and attention, these issues are typically manageable.
– Error messages and how to resolve them
While uninstalling Eclipse on Mac, you may encounter some pesky error messages. These can be frustrating but are usually solvable with a bit of troubleshooting.
One common error is related to files being in use. If you see this notification, ensure that all Eclipse-related processes are terminated before attempting uninstallation again. You can do this through the Activity Monitor—just search for any running instances and force quit them.
Another issue might arise from incomplete permissions. If the system denies your request to delete certain files, try adjusting your file permissions or using an administrative account for uninstallation tasks.
Lastly, if you’re facing persistent issues despite following the steps correctly, consider restarting your Mac and retrying the process once more. Often, a simple reboot clears temporary glitches that could hinder proper removal.
– Tips for a smooth uninstallation experience
Before you start the uninstallation process, ensure that all your projects are backed up. This way, you won’t lose any important data while cleaning up.
Take a moment to check for running Eclipse processes in Activity Monitor. If any instances remain active, terminate them first to avoid issues during removal.
Use Finder’s search function effectively to locate all related files and folders. Look beyond the Applications folder; hidden files can sometimes be tucked away in Library directories.
After deleting Eclipse, restart your Mac. A fresh boot helps clear temporary caches and ensures that changes take effect properly without lingering files causing problems later on.
Finally, consider using a third-party application cleaner if you’re looking for a more thorough removal option. These tools often find residuals that manual methods might miss.
Alternative IDE options for Mac users
Mac users looking for alternatives to Eclipse have several robust options. Visual Studio Code stands out with its lightweight nature and extensive extension library, making it highly customizable for various programming languages.
IntelliJ IDEA is another strong contender. Known for its smart coding assistance and powerful refactoring capabilities, it’s particularly favored by Java developers. Its user-friendly interface simplifies complex tasks without sacrificing functionality.
For those interested in web development, Atom offers a hackable text editor experience that supports real-time collaboration through Teletype.
PyCharm caters specifically to Python developers, providing excellent features like code analysis and a built-in debugger tailored to streamline the development process.
Each of these IDEs comes with unique strengths and weaknesses, catering to different needs across the developer community. Exploring these options can enhance your productivity while ensuring you find the right fit for your projects.
– Brief overview of popular IDEs such as Visual Studio Code, IntelliJ IDEA, etc.
When it comes to alternatives for Eclipse on Mac, several IDEs stand out. Visual Studio Code has gained immense popularity due to its lightweight nature and extensive marketplace of extensions. It supports multiple programming languages and offers powerful features like IntelliSense.
IntelliJ IDEA is another contender, renowned for its robust functionality tailored specifically for Java development. Its smart code assistance makes coding efficient, while built-in tools support version control seamlessly.
For web developers, Atom provides a customizable experience with its hackable interface. This flexibility allows users to tailor their workspace according to personal preferences.
Each of these IDEs brings unique strengths that cater to different types of projects and developer needs. Whether you prioritize speed or advanced features, there’s an option available that can enhance your productivity beyond Eclipse’s capabilities.