Are you ready to reclaim precious storage space on your Mac? Whether you’re looking to streamline your workflow, switch to alternative software, or simply need a break from Adobe’s creative suite, uninstalling Adobe Creative Cloud on Mac can seem like a daunting task. Fear not! In this complete guide, we’ll walk you through every step of the process—from navigating the built-in uninstaller to ensuring that no pesky remnants are left behind. Say goodbye to those applications cluttering up your system and hello to a fresh start. Let’s dive in and make this transition as smooth as possible!

Introduction: Why Uninstalling Adobe Creative Cloud on Mac is Necessary
If you’re feeling overwhelmed by the Adobe Creative Cloud on Mac, you’re not alone. While this powerful suite of tools can supercharge your creativity, there are times when you might want to hit the pause button and uninstall it. Whether you’re freeing up space on your hard drive or simply need a break from its extensive features, knowing how to properly uninstall Adobe Creative Cloud is essential.
Many users don’t realize that removing software isn’t just a matter of dragging it to the trash. If not done correctly, leftover files can clutter your system and cause performance issues down the line. So let’s dive into an easy-to-follow guide that will help you completely remove Adobe Creative Cloud from your Mac without any hassle!
Step 1: Check System Requirements and Backup Your Files
Before diving into the uninstallation process, it’s crucial to check your system requirements. Confirm that your Mac meets the specifications needed for Adobe Creative Cloud software. This ensures you won’t encounter any compatibility issues later.
Next, take a moment to back up your files. You may have projects or assets stored within Adobe applications that you don’t want to lose. Use an external hard drive or cloud storage services like iCloud, Google Drive, or Dropbox for this task.
Backing up is simple but vital. Just select the files and folders linked to your work in Adobe Creative Cloud and make copies of them elsewhere before proceeding with uninstallation. This precaution gives you peace of mind as you move forward in removing Adobe Creative Cloud from your Macbook without worrying about losing important data.
Step 2: Prepare for Uninstallation – Disconnect from the Internet and Close All Apps
Before diving into the uninstallation process, it’s essential to prepare your Mac. Start by disconnecting from the internet. This step prevents any potential interruptions or updates that might interfere with your efforts.
Next, close all applications running on your device. Open apps can cause conflicts during uninstallation and may prevent some files from being removed properly. Make sure to save any work before doing this.
Take a moment to verify that Adobe Creative Cloud apps are not lurking in the background. Use “Force Quit” if needed to ensure everything is closed completely.
With these steps complete, you’re ready for a smooth uninstall experience without distractions or complications lingering in the background.

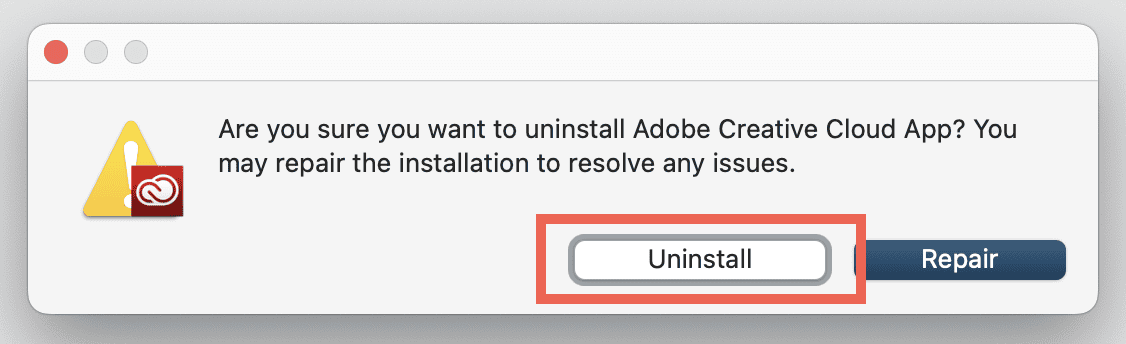
Step 3: Uninstall Adobe Creative Cloud Desktop App
To uninstall the Adobe Creative Cloud desktop app, begin by locating it in your Applications folder. This is where all installed apps reside on your Mac. Open the folder and find “Adobe Creative Cloud.”
Once you’ve located the app, drag it to your Trash bin. Alternatively, right-click (or Control-click) on the icon and select “Move to Trash” from the context menu.
After moving it to Trash, you’ll be prompted for your administrator password. Enter it to authorize this action.
Next, don’t forget about closing any remaining instances of Adobe applications that may still be running in the background. Make sure everything related is completely shut down before proceeding further.
This step ensures a cleaner uninstallation process without leftover files cluttering your system later on. It’s essential for a smoother transition if you plan to reinstall or switch software down the line.
Step 4: Remove Remaining Adobe CC Components
Once you’ve uninstalled the Adobe Creative Cloud desktop app, it’s time to clean up any lingering components. These remnants can take up valuable space and may interfere with future installations.
Start by searching for additional Adobe applications that might still be on your system. Use Finder to locate apps like Photoshop or Illustrator, and delete them if they’re no longer needed.
Next, head over to the Applications folder. Look for any folders labeled “Adobe” or “Adobe Creative Cloud.” Drag these folders to the Trash as well.
Don’t forget about hidden files too! Check in your Library directories—both User Library and System Library—for anything related to Adobe. This includes cache files, preferences, and support files. Deleting these not only helps free up space but also ensures a fresh start should you decide to reinstall later.
Step 5: Delete Associated Folders and Library Files
Now that you’ve uninstalled the main Adobe Creative Cloud application, it’s time to tackle those pesky associated folders and library files. These remnants can take up valuable space on your Mac.
Begin by navigating to your user Library. Hold down the Option key while clicking on the “Go” menu in Finder. This reveals the hidden Library folder.
Within this folder, look for any Adobe-related directories such as Application Support or Preferences. Delete any files that reference Adobe Creative Cloud or individual apps like Photoshop and Illustrator.
Don’t forget about cache files! Check both the Caches folder within your Library and also inspect any other relevant locations where these remnants might linger.
By removing these leftover folders, you help ensure a clean slate should you decide to reinstall later or simply free up storage space now.
Step 6: Empty Trash and Restart Your Mac
After removing all traces of Adobe Creative Cloud, it’s time to tidy up. Head over to your Trash folder. This is where all those files you’ve deleted have been patiently waiting.
Select the Trash icon on your dock and open it. Take a moment to double-check that everything you want is truly in there. When you’re ready, click “Empty” at the top right corner of the window.
This action frees up space and ensures no remnants linger on your system.
Once that’s done, give your Mac a fresh start by restarting it. A reboot helps settle any changes made during the uninstallation process. It also allows your system to function more smoothly without leftover components from Adobe Creative Cloud cluttering things up.
With this final step completed, you’ll enjoy an organized workspace ready for new adventures!
Common Issues and Troubleshooting Tips During Uninstallation Process
Uninstalling Adobe Creative Cloud on Macbook can sometimes hit a snag. One common issue is the uninstallation process freezing or crashing unexpectedly. If this happens, try restarting your Mac and running the uninstaller again.
Another frequent problem is error messages popping up during removal. These might indicate that some files are still in use. Make sure to close all Adobe applications before you begin the uninstallation.
If remnants of Adobe software linger after attempting to uninstall, check for any background processes using Activity Monitor. Force quit these processes if necessary.
Lastly, don’t forget about permissions issues. Sometimes, administrative rights might be required to remove certain components effectively. Ensure you’re logged into an admin account when performing the uninstallation steps for a smoother experience.
Conclusion: Why It’s Important to Properly Uninstall Adobe Creative Cloud on Mac
Properly uninstalling Adobe Creative Cloud on Mac is crucial for several reasons. Firstly, it frees up valuable system resources that could be better utilized by other applications or processes. Adobe Creative Cloud can take up a significant amount of disk space, and removing it ensures your Mac runs more efficiently.
Secondly, an incomplete uninstallation may leave behind residual files that can clutter your system. These leftover components not only consume storage but might also lead to potential conflicts with future software installations or updates. Taking the time to fully remove every trace of Adobe CC helps maintain a clean workspace.
Lastly, if you’re considering switching to alternative design tools or platforms, ensuring that all elements of Adobe Creative Cloud are removed gives you a fresh start without any lingering issues from previous installations. Whether you’re looking to reclaim space or troubleshoot performance problems, understanding how to properly uninstall Adobe Creative Cloud on Mac is essential for maintaining optimal functionality of your device.